Welcome to Linquip Blog. Today and in this article, we are going to have a look at the Multimeter Parts. A multimeter that is also known as a multitester or VOM, is a standard electronic measuring instrument for technicians and electricians in the electrical and electronic industries used to measure various electrical parameters such as voltage, current, and resistance. Some other multimeters can also measure other electrical characteristics and elements such as such as continuity, frequency and capacitance.
Do you want to understand what a multimeter is? Here at Linquip you can find basics of a multimeter, its working principle and applications. Looking for Multimeter Equipment to buy? You are encouraged to visit our Multimeter For Sale at Linquip, where you have access to See List of All Multimeter Products in Linquip based on your application and requirements.
Linquip also offers various Multimeter Suppliers and Companies, so that you can manage to find an appropriate company and supplier that suits your needs. Multiple Multimeter Manufacturers at Linquip can assist you in finding precise equipment based on your needs. You can also find top Multimeter Service Provider companies to manage your industrial equipment service operations such as equipment installations, maintenance and repair services.
Our team gathered all of the necessary information on this topic to eliminate the need for reading diverse content on other websites. Stay with us until the end to find the answer to your question on this topic. We have a long journey ahead of us, so take a deep breath, sit back, and keep reading this article until the end.
Different Parts of a Multimeter
7 main Parts of Multimater are:
- Scale
- Needle Pointer
- Adjustment Screw
- Zero-Ohm Adjustment Knob
- Range Selector Knob
- Ports
- Test Probes
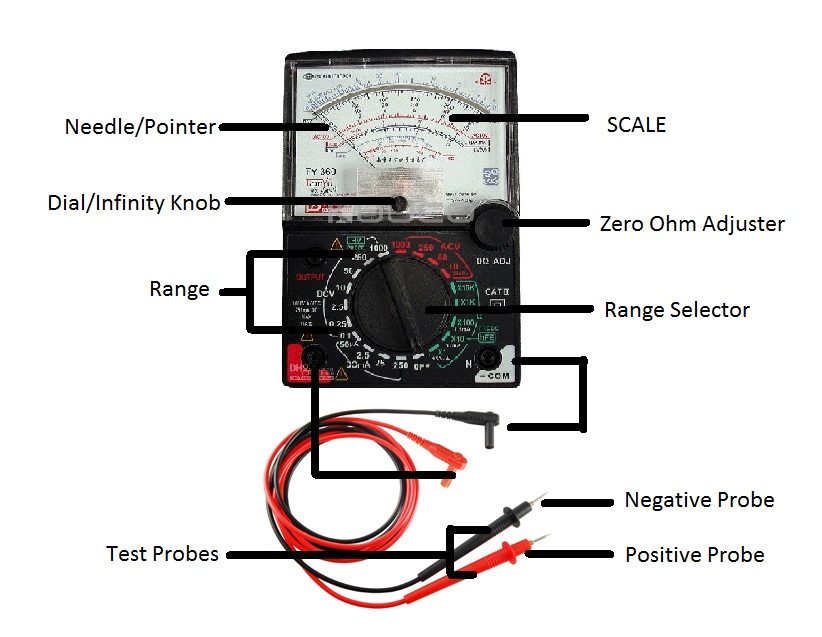
This electronic measuring tool needs a number of components to be able to perform the tasks for which it was designed to work well. So, the result of the cooperation between these parts is measuring the values we have already mentioned. The parts of a multitester are a scale, a needle or pointer, an adjustment screw, a zero-ohm selector, a range selector knob, some ports and test probes.
In the following, we will read more about each of these components, their roles and how they work.
1. Scale: This is how you read the value being measured. For an analog multitester, this is a series of markings in a semicircle. Depending on the complexity of your multimeter, you can read different variations such as voltage, current, and resistance on the device screen and scale section. Which value you are measuring depends on what port you plugged into on your analog multitester.
2. Needle Pointer: This is the needle-shaped rod that moves over the scale of a meter. The needle pointer is mechanically connected to the moving coil. The value the pointer hovers over indicates the value being measured by the multitester. Note that when there are multiple values being measured on the same scale, you’ll need to pay attention to which port the multitester is connected to. Match the port up with the value being measured.
3. Adjustment Screw: This part which is also known as the dial or infinity knob allows you to adjust the pointer to the zero position of the scale. This is usually accompanied with the help of a flat head screwdriver. It is good to know that the name ‘infinity knob’ comes from the fact that at 0 voltage, you have ‘infinite resistance’.
Find All Adjustment Screw In Linquip
4. Zero-Ohm Adjustment Knob: The zero-ohm adjustment knob is used to calibrate the multitester when you want to measure the resistance of an object. To make sure the multitester is calibrated correctly you have to turn on the multitester, then connect the metal tips of the two probes and finally use the zero-ohm adjustment knob to adjust the needle to point to ‘0 ohms’ on the scale.
That’s it! Since you’re not putting anything between the two metal tips, you would expect the multitester to read a resistance value of zero. If that’s not the case – then you need to use the zero-ohm adjustment knob to calibrate the multitester to… zero ohms!
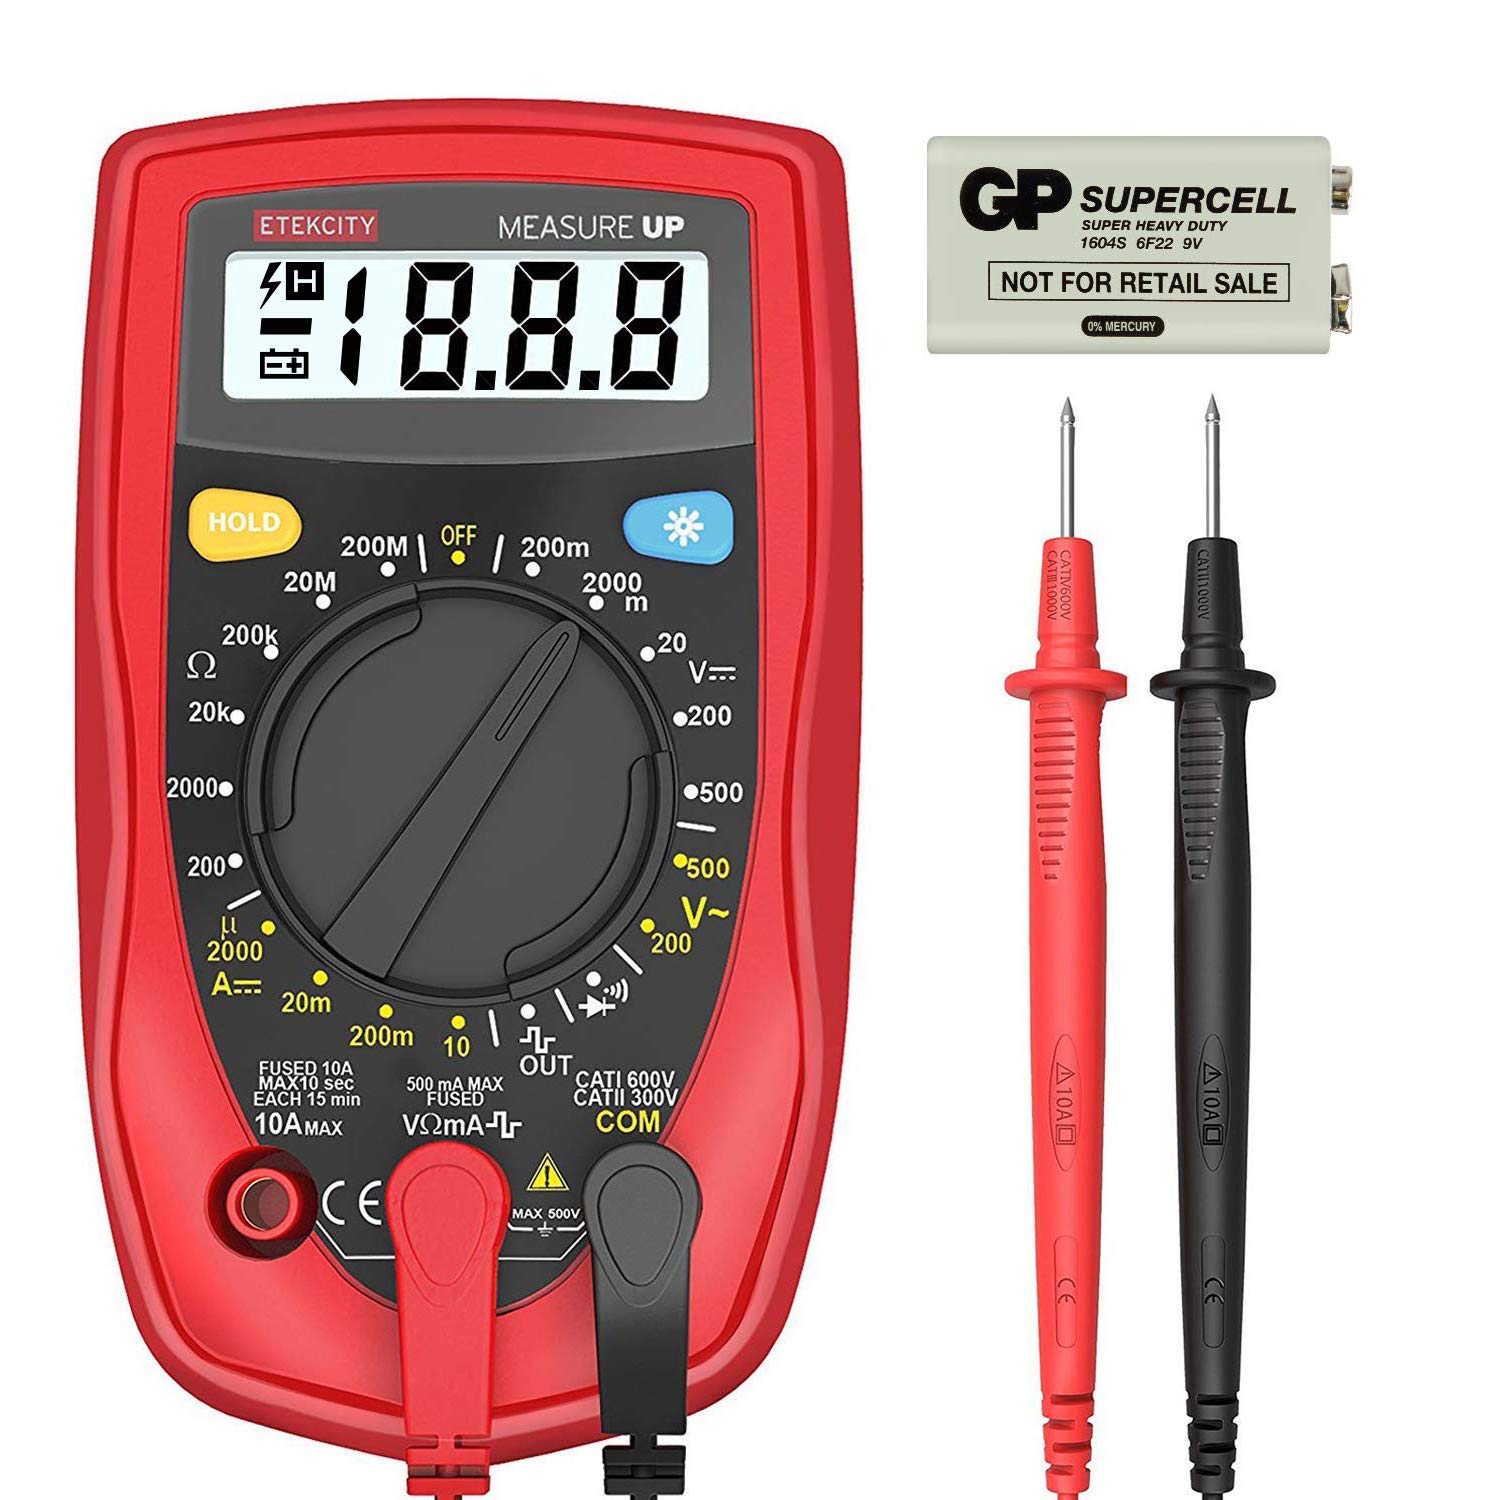
5. Range Selector Knob: This part is also known as a selector switch. A range selector knob allows you to adjust the settings of the multitester (range selector knobs are also present on the best insulation resistance testers). Using this you can change what the multitester is measuring (e.g. voltage, current, or resistance), as well as the range of the measurement (e.g. volts or millivolts). The range selector knob can be auto ranging, or manual ranging.
Auto ranging is much easier to work with. You simply adjust the dial to the symbol corresponding the electrical parameter you want to measure. You connect the test probes and you have your measurement.
Manual ranging, on the other hand, is a little bit trickier. With manual ranging, you need adjust the dial so that the value it is set to is higher than the maximum value you expect from your circuit.
6. Ports: The holes at the front of the multimeter are known as ports. You need to plug your test probes into the appropriate ports to allow the multimeter to measure the parameter that you’re interested in.
7. Test Probes: A test probe or a test lead is an instrument used to connect a multimeter to a Device Under Test which is known as DUT. Test probes are flexible, insulated wires. They are able to establish an electrical connection between a multimeter and the DUT without exposing electrical workers to live conductive parts. Red test probes connect to the positive terminal, and black test probes connect to the negative terminal.
The best multimeter test leads are well insulated, strong, and low cost – while bad test probes can be expensive and fragile. For a simple handheld multimeter, the strong low-cost test leads are usually sufficient.
Do Multimeters Have a Range?
Voltage, current, and resistance are all commonly available measurements on multimeters of various types. When two items are electrically linked, certain multimeters have a continuity check that emits a loud beep. For example, when you are soldering or joining wires, the buzzer signals that everything is linked and there is no loose wire. Short circuits may be prevented by using it to ensure that two items are not linked.
A diode check feature may be found on a few multimeter models as well. Electricity can only flow one way through a diode, like a one-way valve. The diode check feature varies from one multimeter to another. Using the check option may be quite useful when working with diodes, especially if you don’t know which way the diode goes in the circuit or if the diode is operating properly. Make sure to read the handbook if your multimeter has a diode check feature.
The capacity to measure and identify various electrical components, such as transistors or capacitors, may be available in more advanced multimeters. This guide will not cover these features since not all multimeters have them. If you need to use these functions, you can refer to your multimeter’s instruction manual.
Get your industrial equipment from ejawda.com
Download Multimeter Parts PDF
For a better understanding of digital multimeters, familiarity with electrical principles is recommended. There is always something to measure with a DMM. Here, we have provided a PDF of The Basics of Digital Multimeters that can help you better understand digital multimeters.
Conclusion
The present article was an attempt to deliver all the essential information about all the Multimeter Parts. multimeter that is also known as a multitester or VOM, is a standard electronic measuring instrument for technicians and electricians in the electrical and electronic industries used to measure various electrical parameters such as voltage. After delivering a very short and brief definition of multimeters, we went straight to the point and fully explained the seven main parts of a multimeter. In the meantime, we discussed the structure, rolls and the function of these various parts of Multimeters.
If you have any experience or using any kinds of multimeters and know more about them, we will be very glad to have your opinions in the comments on our website Linquip.
Moreover, if you have any questions about this topic, you can sign up on our website and wait for our experts to answer your questions. Hope you enjoyed reading this article.
Buy Equipment or Ask for a Service
By using Linquip RFQ Service, you can expect to receive quotations from various suppliers across multiple industries and regions.
Click Here to Request a Quotation From Suppliers and Service Providers
Read More on Linquip
- Cooling Tower Parts and Functions: A Concise 10,000-Foot yet Essential View
- Steam Turbine Parts: A Comprehensive and understandable Introduction to All Components
- Heat Exchanger Parts: Description of Configuration
- Difference Between Multimeter and Voltmeter
- Brief Look at Types of Multimeters
- Types of Electric Circuits: All Classification with Application
- Types of Circuit Breaker: A Basic Guide to Know Different Classifications
- Thermocouple Types: A Complete Comparison Between Them
- Parts of Generator: a Simple, Yet Useful Guide
- Diesel Generator Parts: A Complete Description
- What are The Electric Generator Parts?
- What are the parts of AC Generators?


I’m just gooo
Dear Sirs
Thank you so much for your useful article. I would be very glad if you could answer my question
I face a problem with my Regal At 1000 analog multimeter and need your help Sir. It uses one 1.5V and one 9V battery that are both new. I set the range selector to R x1 ohm, connect the two probes to each other, and rotate the zero adjuster knob to right but the needle/pointer never reaches to zero ohm and stops on 2 ohms or more. Knowing that the needle is always set on zero by adjustment screw, what could be the reason?
Best wishes
Thanks for visiting our website, Mike! You can visit our Industrial Equipment page, where you can find various pumps based on your application and demand. You can also visit our expert page and take advice from hundreds of professionals on your issue.